This video takes you though configuration of malware and spam protection rules on office 365
Read More →Allow External Communication on Skype For Business
This video shows you how to allow Skype for Business users to both contact people on other Skype for business domains and also allow users to communicate with normal Skype users.
They can use Skype for both IM and normal voice/video chat.
This video is made using a demo tenant on Office 365.
To allow external communication follow these steps:
- Log into Office 365 and go to the Skype for Business Admin Centre
- Click on the “Organisation” tab on the left hand side
- Click on External Communication
- Select “Let people use skype for business to communicate with people outside of this organisation”
- Save the settings
Launch URL from Sharepoint List Dropdown in PowerApps
This example is when you are using a dropdown in PowerApps and wanting to open a link that is in the list with a button.
The list will need to have the URL that you want to open in a proper format eg. “http://heresjaken.com”.
This example below assumes that you already have the Sharepoint List connected to your PowerApp.
Code:
Dropdown1.Items = Distinct(SPList, Title)
Button.OnSelect = Launch(LookUp(SPList, Dropdown1.Selected.Value = Title, Link))

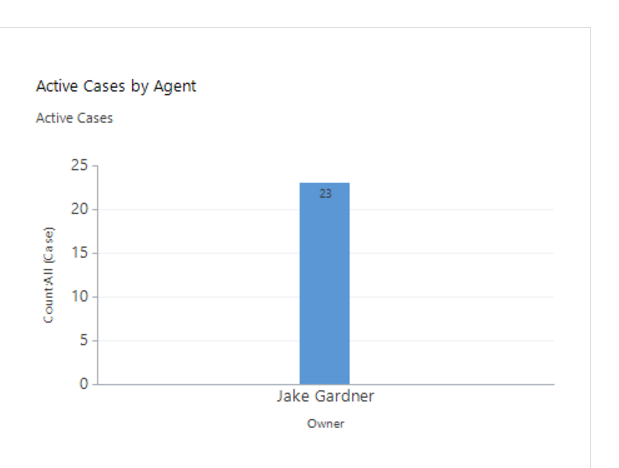
Dynamics 365 Error – You do not have sufficient privileges to view this chart. Contact your system administrator
Charts on the Dashboard page are showing the error: “You do not have sufficient privileges to view this chart”.
As well as many of the entities such as calendars, contacts and accounts provided by default throughout the system are missing.
If this is a new tenant this can happen to users that have been given an Administrator login to Dynamics 365, to fix this problem you need to add some permissions to the user.
How to fix You do not have sufficient privileges to view this chart error in Dynamics 365
Click the three lines at the top, then select settings, then select security. Shown in image below.
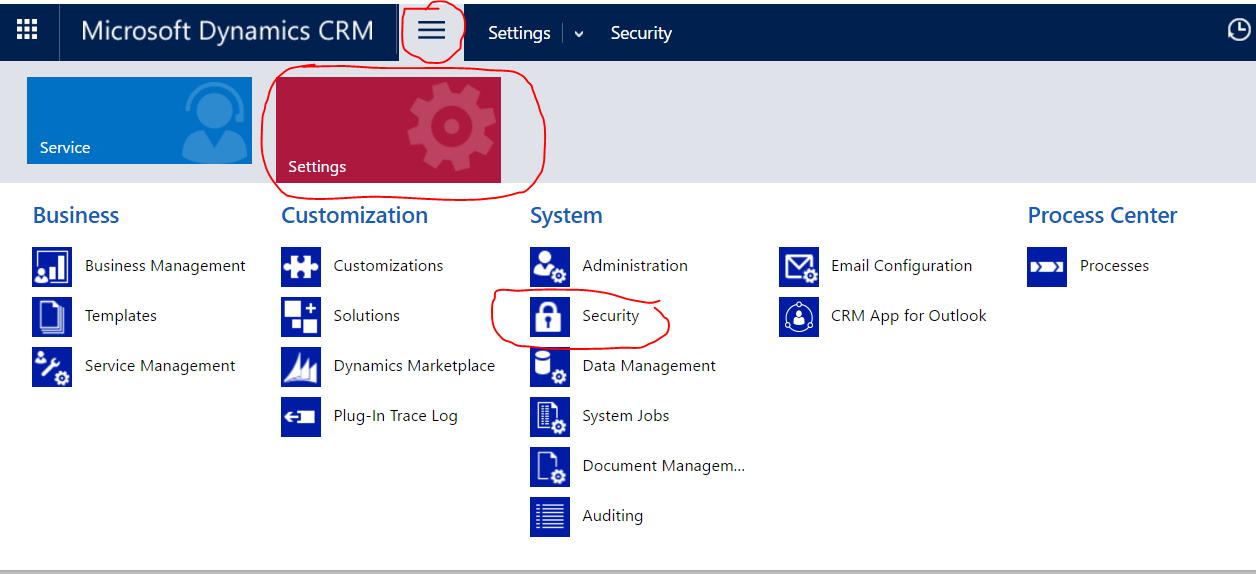
Go into the Users menu
Select the user you want to add permissions to
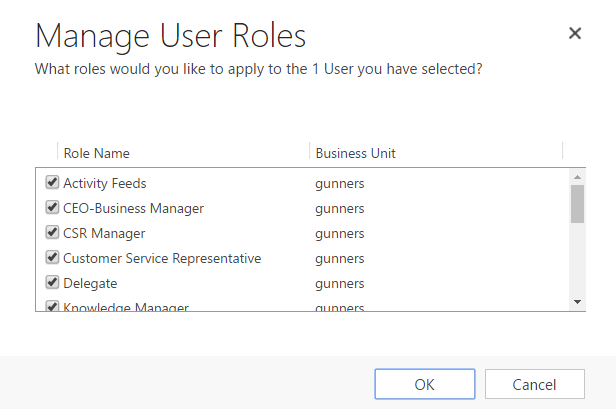
Click the Manage Roles button
Add in the roles that you want the user to have.
Now if you go back to the dashboards you will be able to see the ones you have given the user permissions to see.
Read More →
Introduction to PowerApps
Microsoft PowerApps is a new enterprise service that empowers innovators everywhere to connect, create and share business apps with team members on any device in minutes.
PowerApps is new and still contains some bugs as it is new, but I expect that will be ironed out as time goes on.
PowerApps allows you to connect to your data with an easy to use interface.
This video will show you how to make your first PowerApp from a template and also how to navigate though the PowerApp desktop application.
You can find out more about PowerApps on http://powerapps.microsoft.com/
Read More →Managing Calendar Permissions in Office 365/Exchange with PowerShell
Sharing users calendars is one of the most used parts of an Exchange Server(which is included in most of the business versions of Office 365), this feature allows others inside of your organisation to view or edit calendars.
The old school way of doing this was to go around to each user and set the permissions directly on the calendar by right clicking on it and selecting properties, then navigating to the permissions tab where you could set the permissions for each user or group over the calendar.
But there is a better way. We can use PowerShell to set these permissions in bulk on either exchange or office 365.
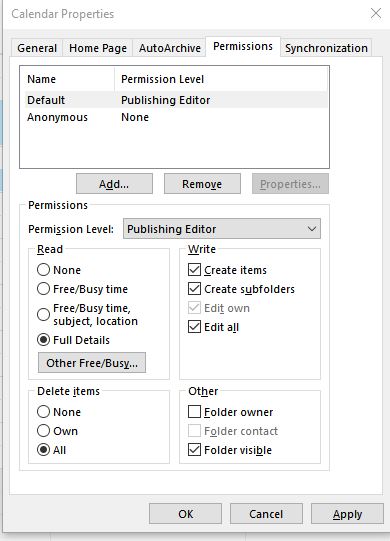
So what are the different exchange calendar permission levels?
Straight out of the box calendars come with a bunch of preset permission levels, this makes your life easier because you can allow a bunch of different controls over the calendars from not being able to see them or being able to set users to be able to book meetings and delete meetings if needed. The different permission levels are as follows:
- None – FolderVisible
- Owner – CreateItems, ReadItems, CreateSubfolders, FolderOwner, FolderContact, FolderVisible, EditOwnedItems, EditAllItems, DeleteOwnedItems, DeleteAllItems
- PublishingEditor – CreateItems, ReadItems, CreateSubfolders, FolderVisible, EditOwnedItems, EditAllItems, DeleteOwnedItems, DeleteAllItems
- Editor – CreateItems, ReadItems, FolderVisible, EditOwnedItems, EditAllItems, DeleteOwnedItems, DeleteAllItems
- PublishingAuthor – CreateItems, ReadItems, CreateSubfolders, FolderVisible, EditOwnedItems, DeleteOwnedItems
- Author – CreateItems, ReadItems, FolderVisible, EditOwnedItems, DeleteOwnedItems
- NonEditingAuthor – CreateItems, ReadItems, FolderVisible
- Reviewer – ReadItems, FolderVisible
- Contributor – CreateItems, FolderVisible
What are the PowerShell commands used to manipulate calendar permissions?
The basic PowerShell commands you can use to edit the permissions of calendars are(each one has a link to the official Microsoft documentation):
- Add-MailboxFolderPermission
- Get-MailboxFolderPermission
- Remove-MailboxFolderPermission
- Set-MailboxFolderPermission
Notice that all of the commands are to do with MailboxFolderPermission, this is because Exchange actually treats the calendar as a folder, so whatever we are doing to the calendar we are actually doing to an exchange folder.
Using PowerShell to Edit Calendar Permissions
So now lets get into it, if you are using Microsoft Exchange installed on your server then you can just open the Exchange PowerShell application, if you are using Office 365 you will need to first connect to office 365 in PowerShell, you can follow the instructions in that article to connect.
Once you are connected to exchange in PowerShell it is time to run some commands.
Getting a users calendar permissions
To get a users calendar permissions we will use the Get-MailboxFolderPermission command in PowerShell.
Get-MailboxFolderPermission -Identity [email protected]:\Calendar -User [email protected]
Some final notes and recommendations with folder sharing in office 365
- When setting permissions it is best not to set owner permissions for the calendars as this will allow other users to delete the calendar on someone else’s mailbox. This could lead to a real headache as the users calendar will just disappear and they wont know why.
- Setting PublishingEditor permission will allow users to have all permissions except to delete the actual calendar.
- Setting default sharing is usually a pretty handy thing in smaller businesses that are using the service. This will allow for more collaboration and a more open workplace.
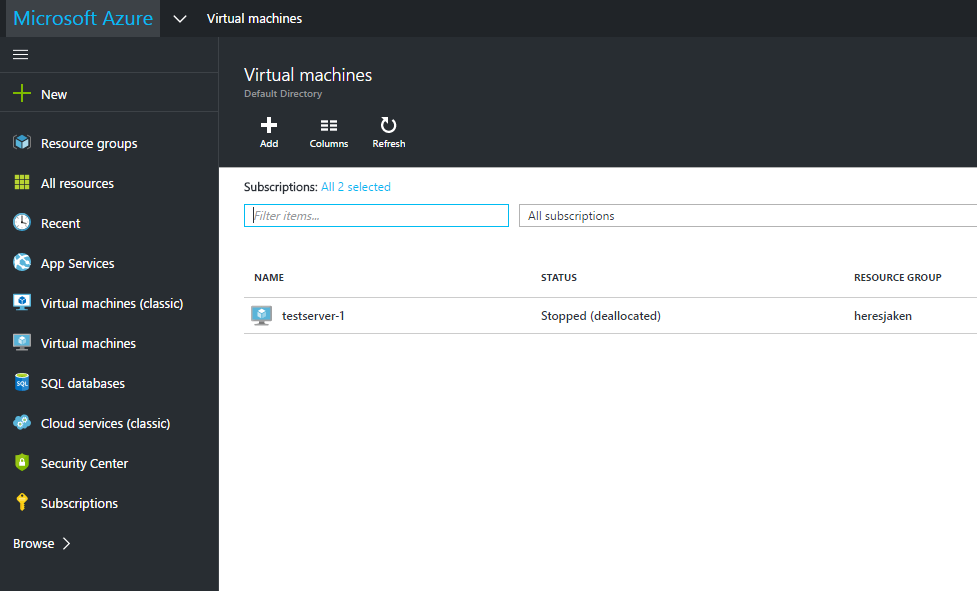
How to Install Server 2012 r2 on Azure
How to Join Windows 10 to Azure AD
As you might know with the release of Windows 10 Microsoft gave the ability to join your computer to Azure Active Directory to manage the devices from the cloud.
The main benefit to connecting your computer to Azure AD is that you get Single Sign On(SSO) to all of your Office 365 apps and as Office 365 uses Azure AD for to store all of its user information if you have Office 365 you have Azure AD.
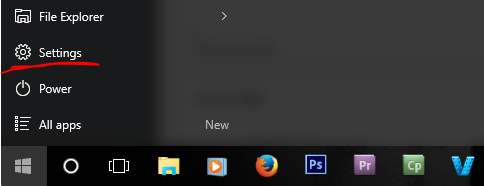
To enroll your device into Azure AD follow these steps
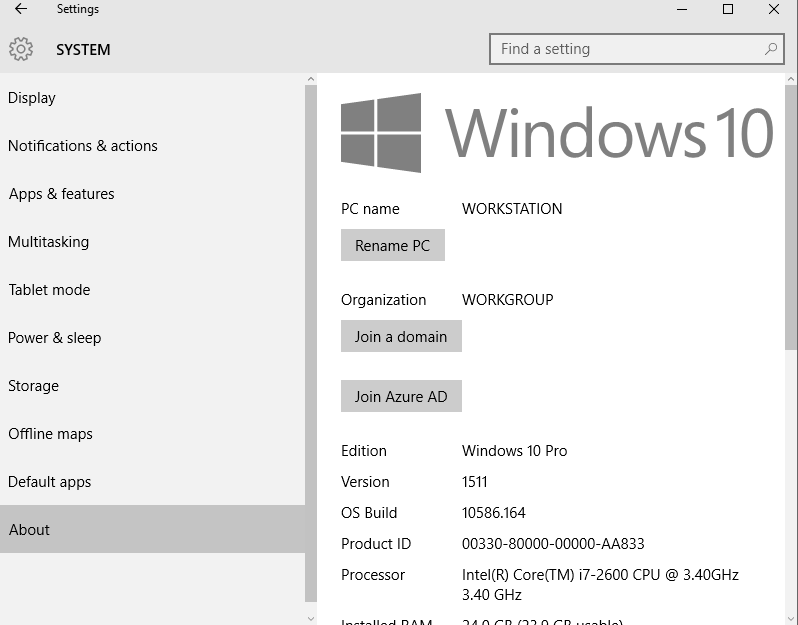
Open the settings
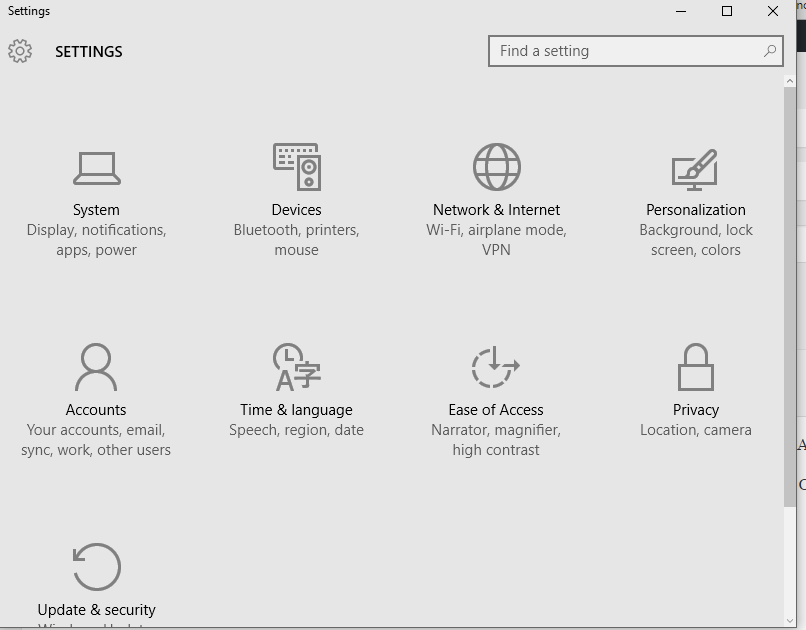
From the settings app open the System settings
Select the about tab and click the Join Azure AD button
Type in your Azure AD Credentials and hit the sign in button
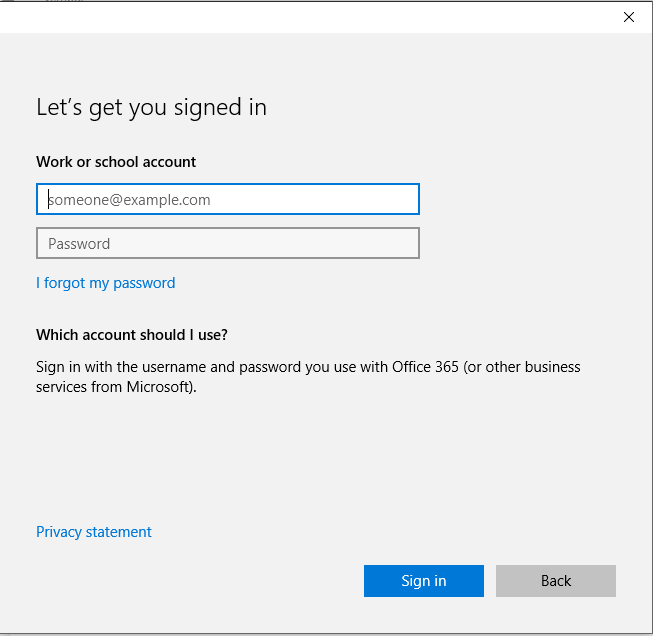
Once you have finished joining AD on Azure then you will need to restart the computer and log in using the Azure AD credentials.
Now you are enrolled into your organisation.
Read More →
How to work out Azure Pricing
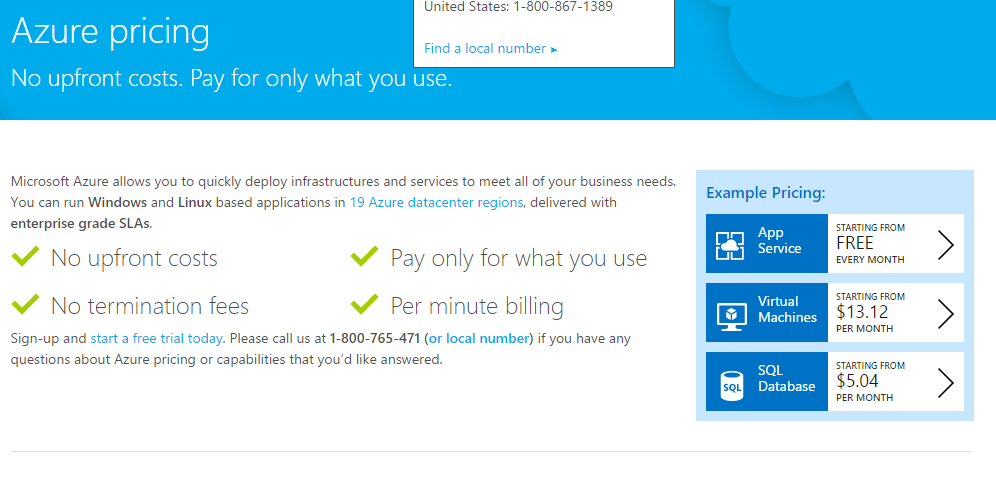
When you are first looking at taking the dive and using Microsoft Azure you will want to be able to figure out how much it is going to cost. There is the Azure Pricing Calculator that you can use to get pricing but this calculator is not 100% accurate.
The acutal price of Azure services changes depending on where you are going to store the servers(meaning which data center or data centers). If you want completely accurate pricing you can look at the Azure Pricing Pages for a more accurate picture of how much your cloud solution will cost.
Watch this video where I show you how to figure out how much azure actually costs.
When you are tying to figure out how much Azure costs make sure you have the solution you want to achieve clearly defined, you will need to know:
- Where you want your services stored
- What services you want to use(servers, web hosting, app services, storage, backup, etc)
- How much data you are going to store
- Estimate of the bandwidth requirments
- How are you going to connect to these services(open ports, VPN, etc)
Wipe Phone or Tablet From Office 365 Business or Enterprise
A good feature of Office 365 is that you can actually wipe a mobile device from it. This can be quite useful if a phone or tablet has been stolen or lost and you do not want people to access your enterprise data.
Microsoft Exchange Server also has this same feature and it is the same process in exchange to do this.
You can only clear the data from a device if it was set up to use Exchange ActiveSync. If the device was not setup with activesync then this will not work.
What you will need to do is:
- login as the administrator to your office 365 portal.
- Then navigate to the ADMIN section on the left hand side and select Exchange. This will then redirect you to the Exchange section of Office 365.
- Inside the Exchange you will need to go to the recipients tab and select mailboxes(Mailboxes should be selected first anyway)
- Then find the user that you want to wipe the mobile device for and select them
- In the right hand side there will be a section saying mobile devices, click on that
- Now it should have all the mobile devices that are associated
- Select the mobile device that is lost or stolen
- Up the top of the window you will be able to select wipe