OK so yesterday I was doing a little bit of video editing and I thought I’d take a look at how hot my CPU was when I was doing it. And honestly I got quite a shock to see that some of my CPU core temperatures were getting above 70 degrees Celsius!!
cputemp

So I decided to do some investigating, I found this wonderful little utility from Intel (who is the manufacturer of my CPU) that tests your cpu, its called Intel Processor Diagnostic Tool.
So I downloaded the tool and ran it, it told me that not only my processor was fine that it is capable of up to 100 degrees. Here I was worried about 70 degrees.
Just thought you all might like to know in case you run into this and get a bit worried.


Read More →
Replies: 0 / Share:

Many of these programs will be detected by virus scanners and some may just delete them as soon as they are seen, so I recommend disabling your virus scanning temporarily while you use these utlilites.

Nirsoft Password Utilities

Mail Pass View
This useful little program will get the passwords out of outlook, Windows Live Mail and some other commonly used mail clients. This does need to be ran with administrator privileges.

IE Pass View
IE Pass View will get cached passwords and usernames out of internet explorer.

Firefox Pass View
Same as IE Passview but for firfox.

Wireless Pass View
This gets your wifi password. It can only get the ones for networks that have the passwords saved on the computer.

PST Password
This gets the password for an encripted outlook pst file.


Windows Password Recovery

**I prefer to just delete the password and reset it because it is quicker and easier than waiting for it to crack a password.

Offline NT Password Registry Editor
This bootable CD lets you either edit the registry or delete the password

KonBoot
This utility will bypass the logon screen of windows and not delete the password. From there you can change another users password or create another user or do whatever it is that you need to.

Read More →
Replies: 1 / Share:

OK to build a high powered laser you are going to need a 2 things, the driver and the diode.

Now we can just purchase the driver but it is a lot cheaper and more fun to make your laser driver. (Its fairly easy as well!!)

What you will need:

  • Soldering Iron: For soldering wires and components together
  • Solder: For soldering wires and components together
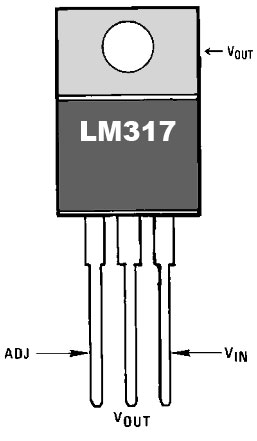
  • LM317 Voltage Controller: To control the voltage, this will bring the voltage down to 1.25V
  • Battery Pack: We use this for a power source, I prefer a 9V Battery
  • Resistor: To manage the current that passes through the laser(to much current will fry your laser)
  • Focus-able Laser Diode: This is the part that actually puts out the light. We need to make sure it is a focus-able laser diode so we can adjust the focus on the laser.

You will need to figure out what size resistor you need. To do this the formula is “Resistance = Voltage / Watts”. The LM317 Voltage controller only lets through 1.25 volts. So that gives us “Resistance = 1.25 / Watts”. Now You need to get the rating of your laser, lets say its 250mw this will now be “Resistance = 1.25/.25” so we need to calculate 1.25 divided by .25, this equals 5Ohms. So we need a 5 Ohm resistor.

LM317On the LM317 Voltage controller there are three pins on the bottom, we will need to use all of these for our laser driver. The right pin or the “V In” pin is were we are going to put our positive current into from the battery pack (which is the red wire). The middle and right pins need the resistor between them. You can use a bread board to do this or you can just make a small one straight off the pins of the LM317.

The left pin or the “Adjust” pin is what you will be hooking your positive wire up to your laser. Now hook your battery up to the “V In” pin and hook the battery up to the black wire coming off the diode. Now you have light.

Now you will need to test it to see if the laser or the laser driver produces alot of heat. If it does then you will need to make some sort of heat sink or another way to get rid of your excess heat.

There you go hope you have fun with your laser 🙂

Please remember:

  • Don’t shine laser at planes
  • Don’t look into laser
  • Always wear safety glasses
  • Don’t shine laser at people
  • Lasers can blind

You can also check out a video of my first laser build

Read More →
Replies: 0 / Share:

Restoring a backup from Microsoft Server 2003 to Server 2008 and above

So you want to restore a backup on a new Windows Server from and older version of Windows Server. Well on Windows 2000, Windows XP and Windows Server 2003 the built in backup program was called ntbackup. In Server 2008 they come up with a new backup program call Windows Server Backup.
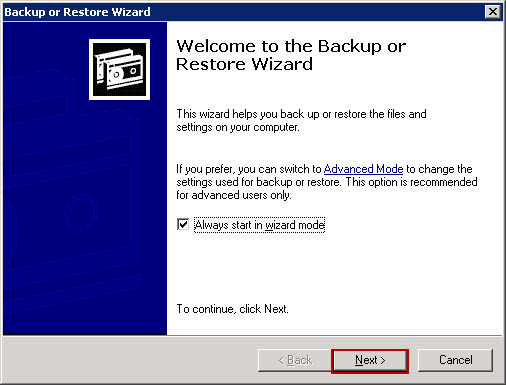
Windows Server Backup will not restore backups from the old ntbackup program, which makes it a little bit difficult when you want to upgrade your server because you don’t have the tool built straight into the OS to restore the old backup. Luckily the “lovely” people at Microsoft made a program very small program to restore ntbackup backups to your server. There is a different program for Server 2008 then Server 2008 R2.

For Windows Server 2008:

Download this.
You will need to install Removable Storage Management on Windows Server 2008
Open Server Manager, navigate to the Features Summary section, and click Add features.
Select the check box next to Removable Storage Manager, click Next, and then click Install.
Then just install it and run from start menu

For Windows Server 2008 R2:

In Server 2008 R2 they have removed the “Removable storage management” feature so the old utility doesn’t work for restoring the ntbackup file(which is .bkf if your wondering…) but Microsoft did release a hot-fix, and this just works you can download it from here you just need to put your details in and they email you an update file and then you apply and ntbackuprestore appears in your start menu. Just run it and restore.

Hope this helps you all 🙂

Read More →
Replies: 1 / Share:

A custom welcome message(or warning message) can be a quite fun thing to do at home to personalize your computer or if you are an system administrator it can be very useful to let people know information that they need to know.
To make a custom welcome message you need to open the registry editor. There are a number of ways to do this, I find pressing the windows button or opening the start menu and then typing the word “regedit” and pressing enter to be the easiest.
Once in the registry editor you need to navigate to:
HKEY_LOCAL_MACHINE\SOFTWARE\Microsoft\Windows\CurrentVersion\Policies\System
Then there are two keys that are red called legalnoticecaption and legalnoticetext. Legalnoticecaption is the heading and legalnoticetext as it sounds is the text underneath the caption.
Once you have edited these log off and your message will be displayed
This works on windows 7 and also windows 8.
Here is a video demonstrating how to make the logon message do this on windows 7.

Read More →
Replies: 0 / Share:

I am using windows 8 at home as a primary OS at the moment and I’ve ran into a few bugs. Today I couldnt access my DVD drive so I looked in device manager and see HL-DT-ST DVDRAM GH24NS90 that has the little yellow symbol next to it. But this is meant to run off the generic windows driver that is included on all windows systems…

Quite strange I was thinking so I decided to look up the hardware ID’s on google and downloaded the driver and installed the driver. Nothing changed, then I found this handy Microsoft KB with a Mr. Fixit. The Mr. FixIt didn’t work due to me running windows 8 and them not updating them to work on windows 8 yet. So I deleted 2 keys out of the registry and restarted. Then there was my DVD drive working again.

Just open the registry editor by pressing the windows button and typing regedit.exe and press enter. Then navigate to:

HKEY_LOCAL_MACHINE\SYSTEM\CurrentControlSet\Control\Class\{4D36E965-E325-11CE-BFC1-08002BE10318}

and delete UpperFilters and LowerFilters and then restart.

Read More →
Replies: 0 / Share:

Standard Windows Key combination does not work in the Hyper-V virtual machine, it will just send it to the physical host. So they have changed the keyboard shortcuts to work in Hyper-V. I think they should put a button on there that you can click to send all keyboard shortcuts to the virtual machine but as yet they haven’t. So here are the ones that microsoft in all thier wisdom have decided that we need inside of a Hyper-V:
CTRL + ALT + DEL = CTRL + ALT + END

which displays the Task Manager or Windows Security dialog box on Windows (or logs in).
ALT + TAB = ALT + PAGE UP

which Switches between programs from left to right.
ALT + SHIFT + TAB = ALT + PAGE DOWN

which Switches between programs from right to left.
ALT + ESC = ALT + INSERT

which Cycles through the programs in the order they were started.
CTRL + ESC = ALT + HOME, 

which Displays the Windows Start menu.

Some extra ones just for inside Hyper-V:
CTRL + ALT + PAUSE Changes the Virtual Machine Connection window to / from full screen mode.
CTRL + ALT + LEFT ARROW Releases mouse and keyboard focus from the Virtual Machine Connection window.

Some extra things to know about Virtual Machine Connection key combinations:

The default standard Windows key combinations do not get sent to the Hyper-V virtual machine, unless you are in full screen mode. If you can change this so that they are always sent to the virtual machine (if the Virtual Machine Connection has focus) by going to the Hyper-V Manager and selecting Hyper-V Server Settings… and then Keyboard and selecting the Use on the virtual machine option. I always enable this setting.
But CTRL + ALT + DEL will always go to the physical computer – so you need to use CTRL + ALT + END no matter what you select for a setting here.

Related Posts:

How to Install Windows Server 2012

Active Directory Tutorials

Read More →
Replies: 4 / Share:

Now for some reason they seem to have changed how to get into safe mode when your Windows PC or laptop will not start.

You used to just be able to press the F8 key repeatedly to get your boot options up. Now you have to get into the Windows 8 recovery console on boot-up to get to safe mode. To get to the recovery console hold the SHIFT key and repeatedly press F8 after the BIOS screen if you see the normal Windows 8 start-up then you know that you have gone to far and you will need to restart your system.

From here you will need to select the troubleshoot option that is highlighted in the picture.

Then in the troubleshoot options you will need to select Advanced Options.

In the advanced options menu you then go on to select Windows Startup Settings.

Then you will need to reboot your system and you will be greeted with the familiar boot options menu, from here select safe mode, or safe mode with whatever option you need and then it will(or hopefully will) boot into safe mode.

Not sure why Microsoft have decided to make getting into safe mode difficult but they have and I guess we will all just have to deal with it…

Read More →
Replies: 0 / Share:

This is a ransom-ware type of virus that demand you pay $100 to “ucash”. Now really why would the AFPwant you to pay money to someone called ucash? It doesn’t. This is a scam to try to trick you out of your hard earned cash.

australian-federal-police-ukash-virus
This virus is very tricky to remove. About a month ago you could use this really good little program that runs on start-up called hitman.kickstart pro. You just register for the one month trial version. That when I tried it this morning it did not work for this virus anymore. I also tried the Kaspersky rescue disk with no luck. And whats really bad about this virus is when you boot to safe mode the computer restarts itself.
What I did to get rid of it is boot to safe mode with command prompt. To do that as the computer is starting up press the “F8” key repeatedly and the windows boot options will appear.  Select “safe mode with command prompt”. Now it will boot up and open a command prompt window.
We need to make a new user by using the command “net user virusremoval /add” this will create a new user called virusremoval.
Now we want to add the user to the local administrators group by using the command “net localgroup administrators virusremoval /add”.
Now you can reboot the PC by using the command “shutdown /r /t 0”
Once the PC has rebooted log in as the new user that we have just created as this user will not be infected. From here we will need to do a system restore.
After the system restore on PC is finished you will only have the original users again anf you will be able to log in as your normal user again.
Once logged in as your normal user follow the instructions on this post about how to remove the virus. I would run combofix fir this virus, after running mbam I still got a hit on combo fix today when removing this virus.

Read More →
Replies: 3 / Share:

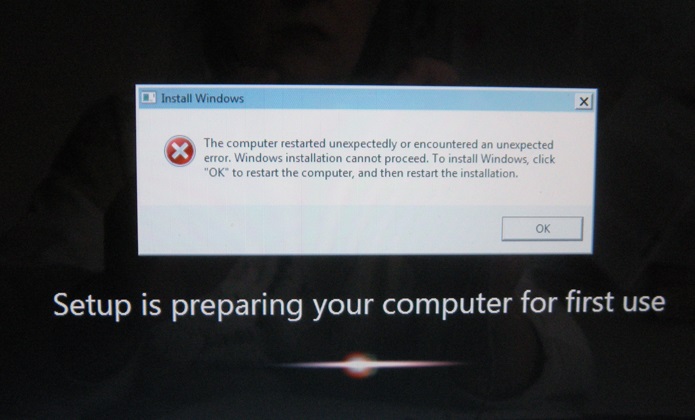
“The Computer Restarted unexpectedly or encountered an unexpected error” during installation of windows

Update 16/8/2015: many people are are getting stuck during in upgrade of windows 10 and it starts getting stuck anddoing an endless reboot. If you get this issue you will want to do a clean install of windows ten.

Update 3/8/2015: This issue has been happening with Windows 10 installations as well, the same fix described in this post works with Windows Vista, Windows 7, Windows 8, Windows 8.1 and Windows 10.

error message

The error message “The Computer Restarted unexpectedly or encountered an unexpected error” is most commonly caused by an interruption of the power supply such as power failure or pressing restart during the final stage of windows installation process.

Fixing this error is reasonably easy just follow these steps:cap2

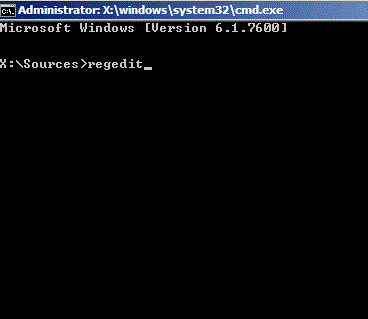
When the error appears press SHIFT+F10 and it will open up the command prompt.

Open the registry editor by typing in the command “regedit”

Now the registry editor appears, you now need to navigate to:

HKLocal machine/SYSTEM/SETUP/STATUS/ChildCompletion

Now find the key called “setup.exe” the value needs to get changed from 1 to 3. To do this just double click on the registry key and change the keys value.

Now exit regedit and hit ok on the error message. Now your computer will restart and continue on the Windows setup process as normal.

setup


Related Posts:

How to install Windows 8

How to install Windows 7

How to Remove A Virus

Read More →
Replies: 484 / Share: