It is good practice to monitor outbound spam, if a computer gets infected with a virus or your exchange passwords are compromised the attacker can use your exchange or office 365 mailbox to send out spam.
Once this is setup if the server detects and blocks outbound spam it will send a notification email to you (or the admin) then you can investigate why this is happening.
The setup process is basically the same in both office 365 or Exchange on Premis.
How to setup the outbound spam notifications
Go to EAC
Open Protection
Click outbound spam
Open the default policy (or any other policy)
Select Outbound spam preferences
Tick the Send notification to the following email address or addresses when a sender is blocked for sending outbound spam.
Enter the email you want the notification to go to.
Now if any of your mailboxes are sending out spam you will know about it!!
After recovering from a failed Exchange Server I was getting wierd issues where things weren’t working properly. After some investigation I found that the old mailbox was still showing in EAC.
I tried to delete it and got an error that said:
This mailbox database contains one or more mailboxes, mailbox plans, archive mailboxes, public folder mailboxes arbitration mailboxes, or audit mailboxes. To get a list of all mailboxes in this database, run the command Get-Mailbox -Database . To get a list of all mailbox plans in this database, run the command Get-MailboxPlan. To get a list of archive mailboxes in this database, run the command Get-Mailbox -Database -Archive. To get a list of all public folder mailboxes in this database, run the command Get-Mailbox -Database -PublicFolder. To get a list of all arbitration mailboxes in this database, run the command Get-Mailbox –Database -Arbitration. To get a list of all Audit mailboxes in this database, run the command Get-Mailbox -Database -AuditLog. To disable a non-arbitration mailbox so that you can delete the mailbox database, run the command Disable-Mailbox . To disable an archive mailbox so you can delete the mailbox database, run the command Disable-Mailbox -Archive. To disable a public folder mailbox so that you can delete the mailbox database, run the command Disable-Mailbox -PublicFolder. Audit mailboxes should be moved to another server; to do this, run the command New-MoveRequest . If this is the last server in the organization, run the command Get-Mailbox -AuditLog | Disable-Mailbox. Arbitration mailboxes should be moved to another server; to do this, run the command New-MoveRequest . If this is the last server in the organization, run the command Disable-Mailbox -Arbitration -DisableLastArbitrationMailboxAllowed to disable the arbitration mailbox. Mailbox plans should be moved to another server; to do this, run the command Set-MailboxPlan -Database
Upon further investigation it turns out I couldn’t delete the mailbox because it thought that the arbitration mailboxes still existed on that mailbox database.
If you follow the steps in the video above, you will be shown how to delete the arbitration users and recreate them.
You will need the exchange installation media, which you can download from Microsoft.
While forgetting your domain admin password is not really something you should do you may come across a server that you don’t know the domain administrator password for this video will help you.
You will need a Windows Server installation disk to complete these steps.
Boot to a windows server 2012 r2 CD and hold shift F12 then run the bottom two commands
Once that is done you can reboot the server and click on the “Ease of Access” button. This will give you a command prompt where you can reset the domain admin password using the net user command:
net user administrator *
It will then prompt you for the new password.
Type in the new password that you want and hit enter.
Now you have reset your domain administrator password and you can log into the server.
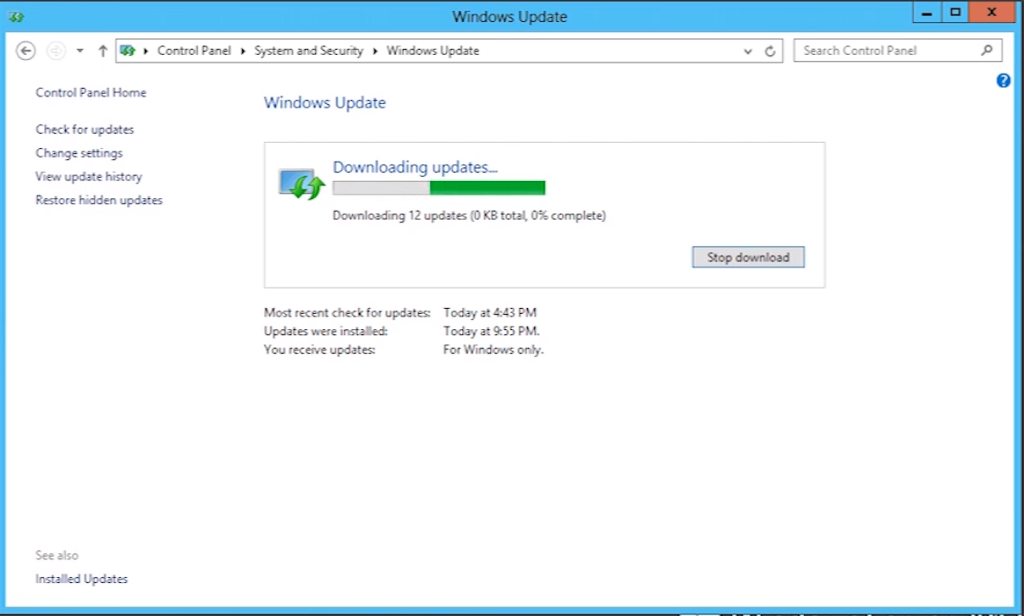
Microsoft have remove Windows Update from the Control Panel so now it has to be done through the settings app.
When I first when I went to update I couldn’t find Windows Update in the control panel then I figured out that it is only available through the Settings App or powershell.
Windows updates should generally be scheduled using group policy. However, should you need to apply a Windows update manually, follow the steps below.
To install updates in Server 2016:
Open the settings app
Go to updates down the bottom
Click check for updates
Install the updates
Once the updates are installed you may need to reboot your server.
This is a really good thing to do when you first install Windows Server 2016, before installing everything else. This will mean that your server is patched and any issues that have already been resolved by a patch from Microsoft will not happen.
Deploying Windows 10 from a DVD in a business environment is time consuming, while it may be very good for a one off installation of Windows 10 when you need to deploy images often there is a better way.
Deploying Windows 10 using Windows Deployment Services(WDS) with your windows server 2012 R2 server is the way that you can speed this up. WDS is a Microsoft server technology for deploying network based installation of Windows.
To use WDS the following requirements will need to be met:
Sign into the server and open the Server Manager if it does not open automatically.
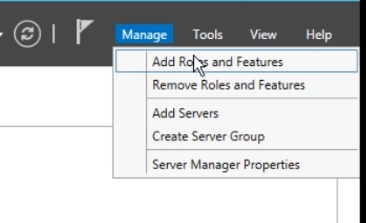
Click the Manage button in Server Manager and select Add roles and features.
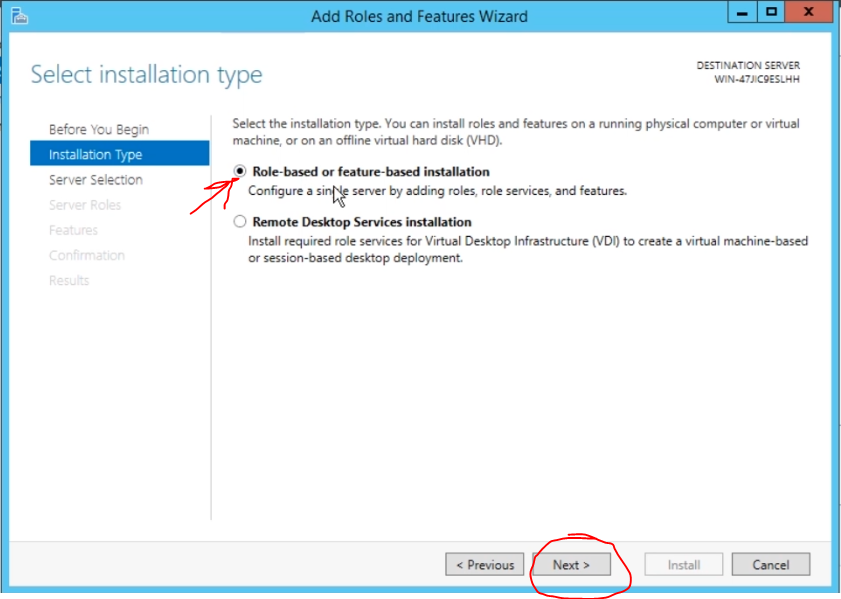
On the Select installation type page, select Role-based or feature-based installation and select next.
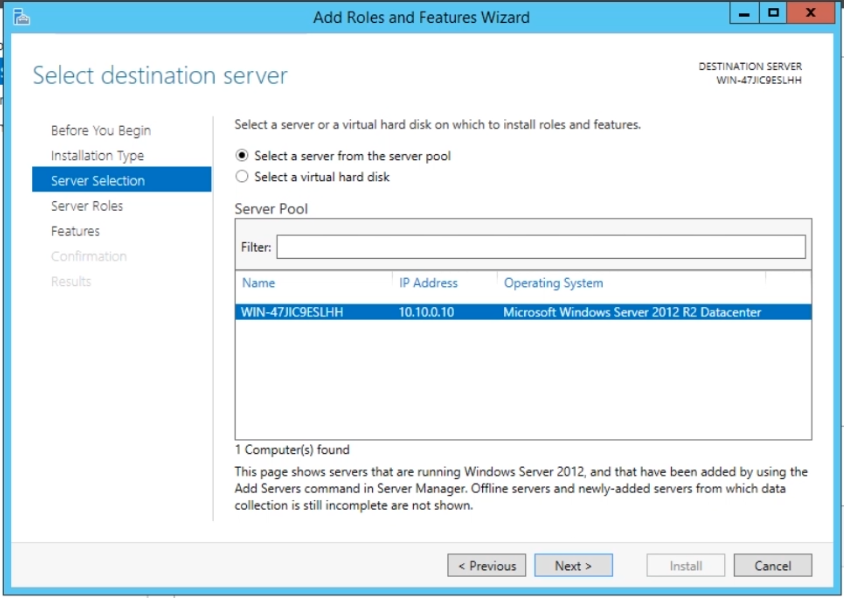
Select your server and click next
On the Select server roles page, tick Windows Deployment Services box, a box will pop up saying Add features that are required for Windows Deployment Services? click the Add Features and click next.
On the Select features page, click next.
On the role services page, make sure both Deployment Server and Transport Server are ticked and click next.
On the Confirm installation selections page, click the install button.
When the installation process completes successfully, click the Close button and go to the Server Manager screen.
Now the Windows Deployment Services role is installed.
Configuring Windows Deployment Services
In the Server Manager click the Tools button in the top right hand corner and select Windows Deployment Services, this will open the WDS console.
Expand servers, right click on your server name and click Configure Server.
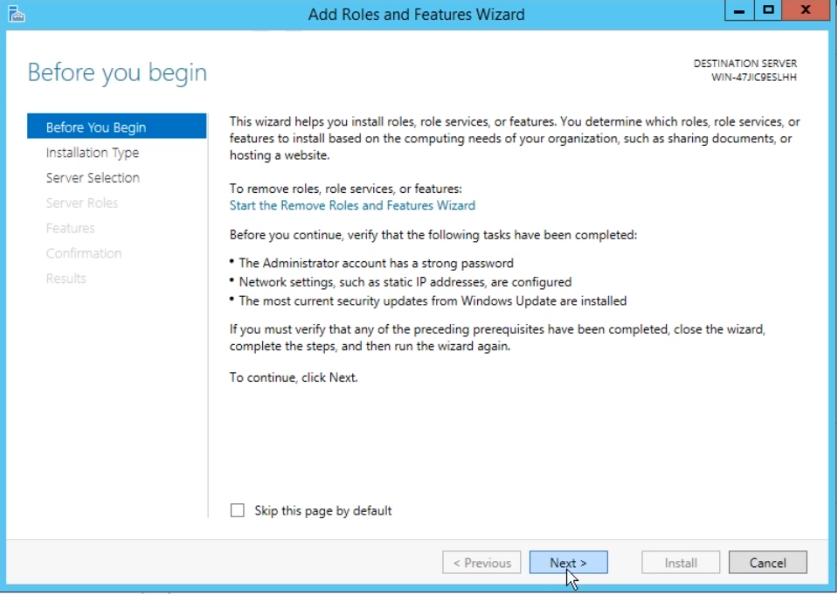
Read over the Before you begin screen and confirm that your configuration meets the requirements and select next.
On the Install Options page you will need to select integrated with Active directory and click the next button.
On the Remote Installation Folder Location, select the location where you want to keep all of that Windows Images and configuration files and select next. – The Remote Installation Folderis recommended not to be on the system partition of your server, you should also make sure there is enough storage space to store these files as you add more to it.
On the PXE Server Initial Settings page Select the appropriate setting that you want. We are going to use respond to all client computers(known and unknown) because we want to be able to deploy images to any computer on the network.
Tick the box Add images to the server now and select Finish. This will now pop up with the options to Add images to your WDS server.
Adding Images to Windows Deployment Services
Insert your Windows 10 DVD into the server(or mount the ISO image for a Windows 10 installer to your VM if you are using a Virtual Machine)
We will now add the install.wim and boot.wim file to WDS from the Windows 10 installation media.
The boot.wim file is a Windows PE image that you boot from a client computer to install an operating system
Inside of the Windows Deployment Services pane expand out your server name in the left hand side, right click on Install Images and select Add Install Image…
Name your image group and click the next button.
Click browse on the Image Files page and navigate to your DVD drive, go to the sources folder and select install.wim
Click open and select next.
This page will give you the Available images, your installation media may have more than one image available, select whichever ones you want to be able to deploy and then click next.
On the summary page, click next. This will now take a little while to check the integrity of the images
Once that is finished you will be able to look inside of the Install Images folder and see you image group, if you select your image group it will have the install images that you have added in there.
Now all you have to do is add the boot.wim file. To do this right click on Boot Images, and select Add Boot Image, then run though the same steps that you did when adding your install.wim except select boot.wim.
Now you will be able to deploy Windows 10 using WDS!!
Just use PXE boot and you will be able to install Windows 10 using your new WDS Server.
This tutorial shows you how to Install Active Directory, DNS and DHCP to create a Domain Controller. You can watch the video or follow the steps on the page.
I recommend using better specs then that but it will work on a computer or VM that has those specs.
Installing Active Directory and DHCP Server Roles
This assumes that you already have a fresh installation of Windows Server, if you don’t yet follow the steps on how to install Windows Server article.
Set a static IP address on the network adapter, to do this:
Open the network and sharing center
Click on Change Adapter Settings
Right click on the network adapter
Select Properties
Select Internet Protocol Version 4
Click Properties
Type in your Static IP address configuration
Click OK
Open the server manager.
Select Add Roles and Features
On the Before You Begin screen select next
Select Role-based or feature-based installation and click the next button.
Select the server that you want to install the role on and click the next button
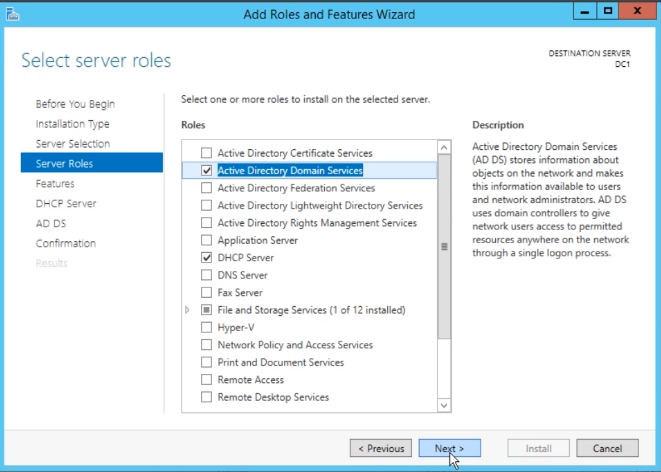
On the next screen tick Active Directory Domain Services and DHCP Server.
On the next screens leave the default settings and select next and then install.
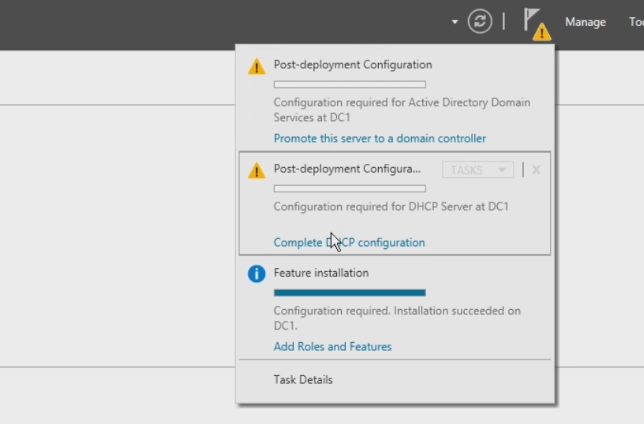
Once the installation of DHCP and Active Directory roles is complete you will get a notification in the Server Manager console to “Promote this server to a domain controller” and to “Complete DHCP configuration”. You can to run the “Promote this server to a domain controller” first, click on that.
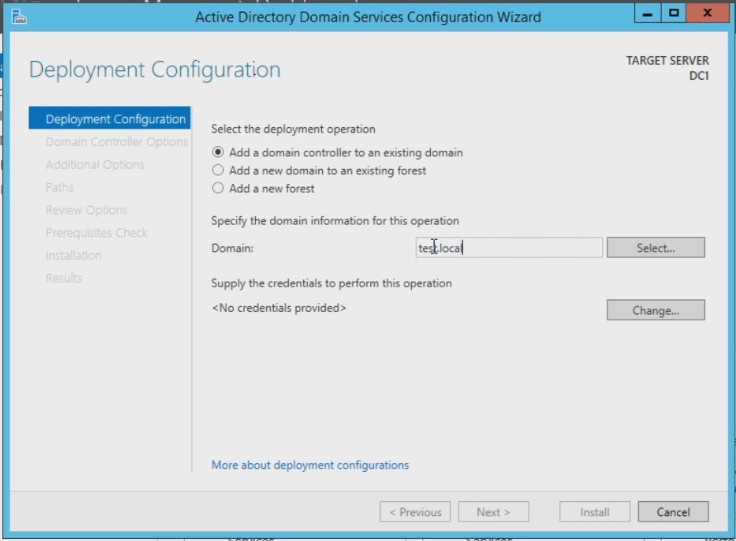
This will bring up the Active Directory Domain Services Configuration Wizard. You want to select “Add a new forest” and give the domain a name. It is better to use the <domain name>.local or a subdomain of a domain that you control. Then select next.
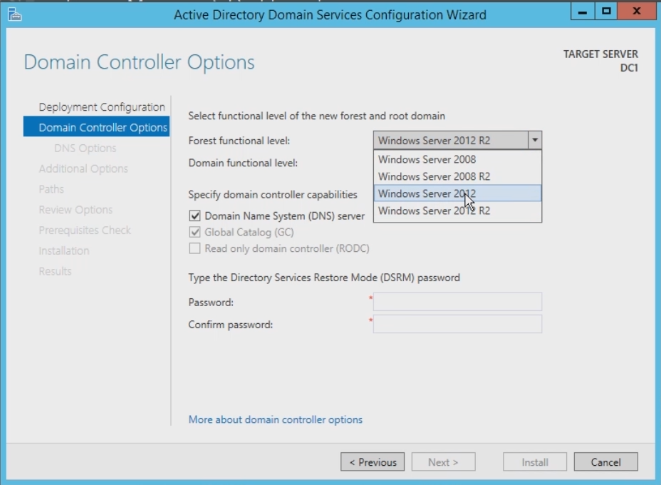
Next choose the forest function level. If you are just using server 2012 R2 then select that otherwise select the lowest version of Windows Server that you are going to have joined to the domain, give the domain a DSRM password(make sure you document this password) and select next.
Leave the rest of the settings as default and keep clicking next though the wizard. At the end of the configuration wizard you will be signed out and the server will be rebooted. Once the server is rebooted it will be a domain controller.
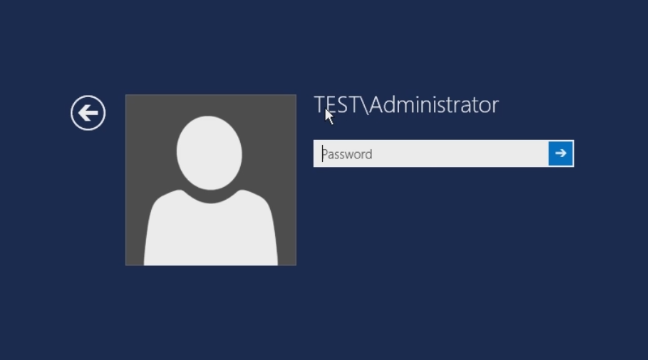
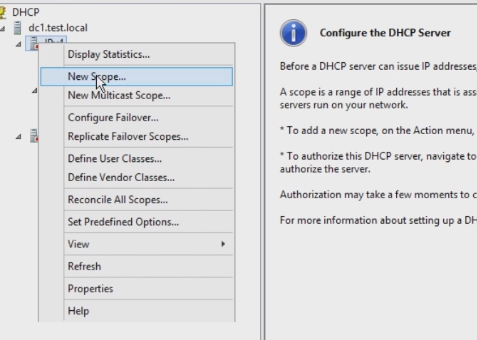
Log into the server and open DHCP in the start menu. You will notice that it is not configured yet.
Right click on IPv4 and select “New Scope”.
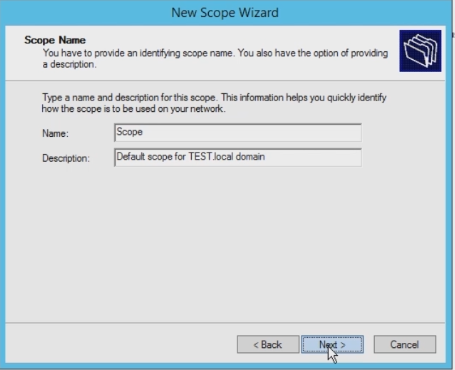
This will open the “New Scope Wizard”, give the scope a name and description and click next.
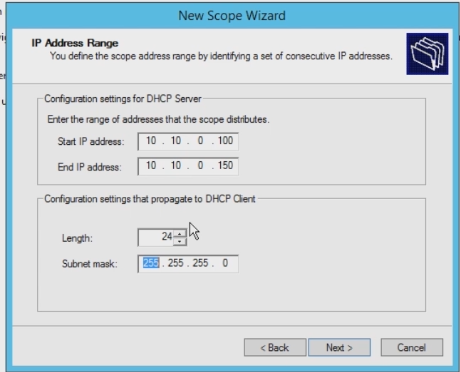
Now you will need to set the IP range. To do this enter a start IP and end IP that is on the same subnet as you.
You will want to make sure that these IP addresses are available.
The next screen allows you to add any exclusions to the IP range. If there is some IPs allocated for something(maybe phone system) then exclude them from your DHCP. Select next.
Then you can set your lease duration time, set this and select next.
Then you will want to configure your scope options, this is where you configure your router and default gateway address and anything else that needs to be allocated by DHCP. Go though these settings and allocate as needed for your network.
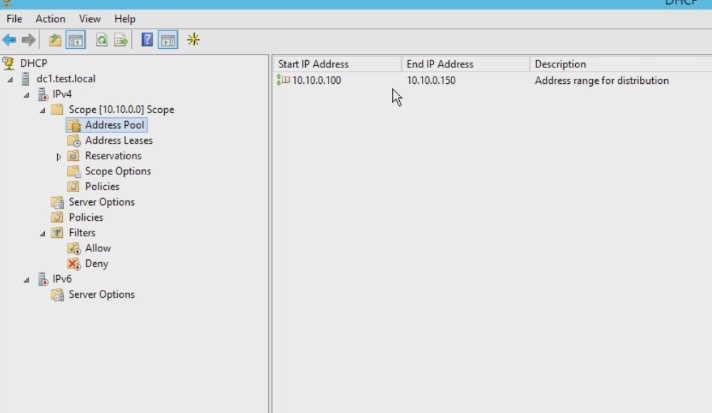
Now you will be able to see your DHCP scope in the DHCP console.
All done, now you have a domain controller that also runs DHCP.
This issue is when connecting to a Hyper-V session the virtual computer logs in and then automatically logs you out with a message that says:
“The connection was lost because another user connected to the virtual machine. Try to connect again. If the problem persists, contact your system administrator.”
There are two ways to fix the Hyper-V error
Fix 1
Add a password to the virtual machine. This will allow the virtualised computer to be connected to then you can type in the password for the user and it will not kick you off.
Fix 2
Turn off Enhanced Session Mode
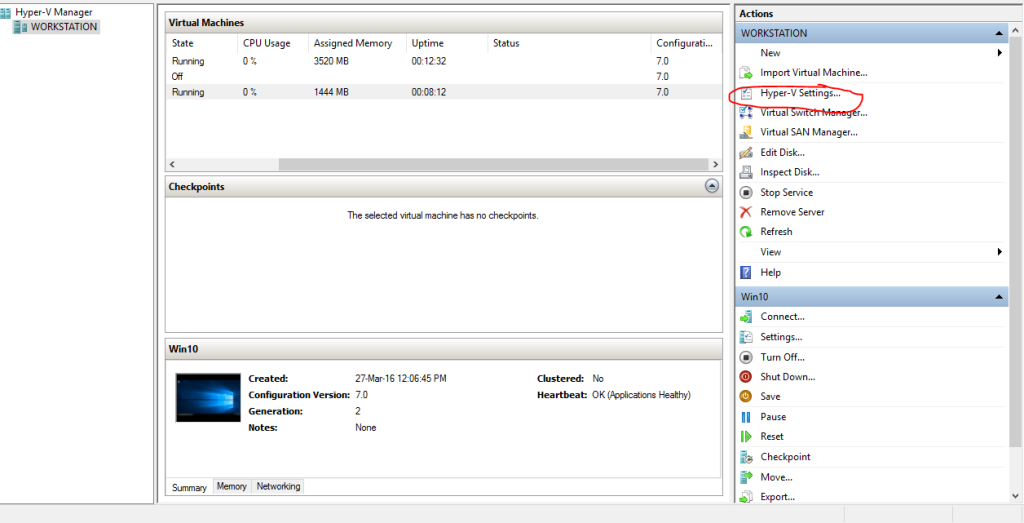
To do this open the Hyper-V Manager and select settings in the right hand pane
Then select Enhanced Session Mode Policy in the left hand pane and untick the box that says Allow enhanced session mode and hit OK button
Moving the default storage location for the “Server Folders” can help to reduce the risk of the C: drive filling up and also if the storage was on the C: drive then you can move these folders to another drive.
By default Windows Server Essentials has five shared folders stored under C:\ServerFolders called:
Client Computer Backups
Company
File History Backups
Folder Redirection
Users
How to move the folders
Open Server Essentials
Select STORAGE in the top menu
Select the folder that you want to move
Select Move The Folder in the right hand menu
It will then calculate the folder size
Select the drive that you would like to move the folder to
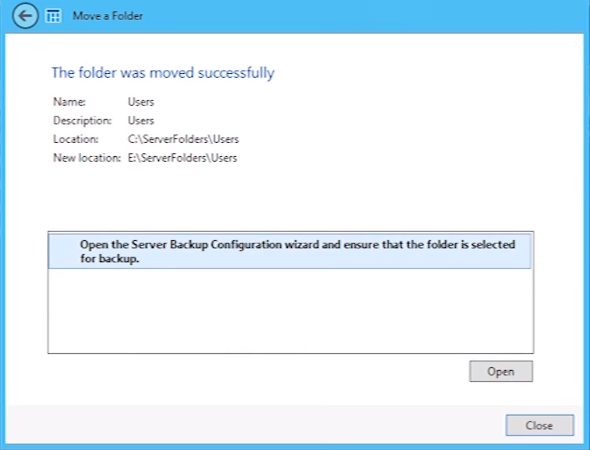
Click the Make Folder button
It will give you the option to reconfigure Server Backup to make sure that the folder is backed up
Scheduling when updates happen on a Server is essential. You can schedule the updates to install and then the server to automatically reboot at a time when no one is using the server so then end users do not experience any downtime and also you don’t need a technician to manually update and restart the server.